Inventory settings
Configure categories, properties, statuses, tags, and inventory numbers
Global configuration lives under System → Inventory and requires the Inventory settings permission. The Material Sets tab is on the same page and is covered under Material sets; it is also visible to people with the set permissions who may not edit the other tabs.
Settings map
| Tab | Effect for users |
|---|---|
| General | Detailed-item quantity logic, inventory-number display, and maximum article image size |
| Categories & subcategories | Catalog navigation, classification, and expected article properties |
| Properties | Data fields, filters, table columns, and required article information |
| Status Settings | Colour and order of the fixed statuses |
| Tags | Flexible attributes, filter groups, and restricted assignment rights |
| Material Sets | Reusable article collections for material issues |
Central changes may affect existing articles. Test one existing and one new article after an adjustment.
General settings
Detailed articles always with quantity 1 makes every detailed record one
physical unit. Its quantity can no longer be edited. Inventory-number settings
control whether the number replaces the name for detailed units and add a
display prefix such as INV-. The prefix does not change stored data.
Under Article images you set the Maximum size per article image (MB). Values from 1 to 50 MB are allowed, the default is 10 MB. Larger images are rejected on upload. The server upload limits must allow at least this size.
Every change on this tab is saved immediately.
Categories and subcategories
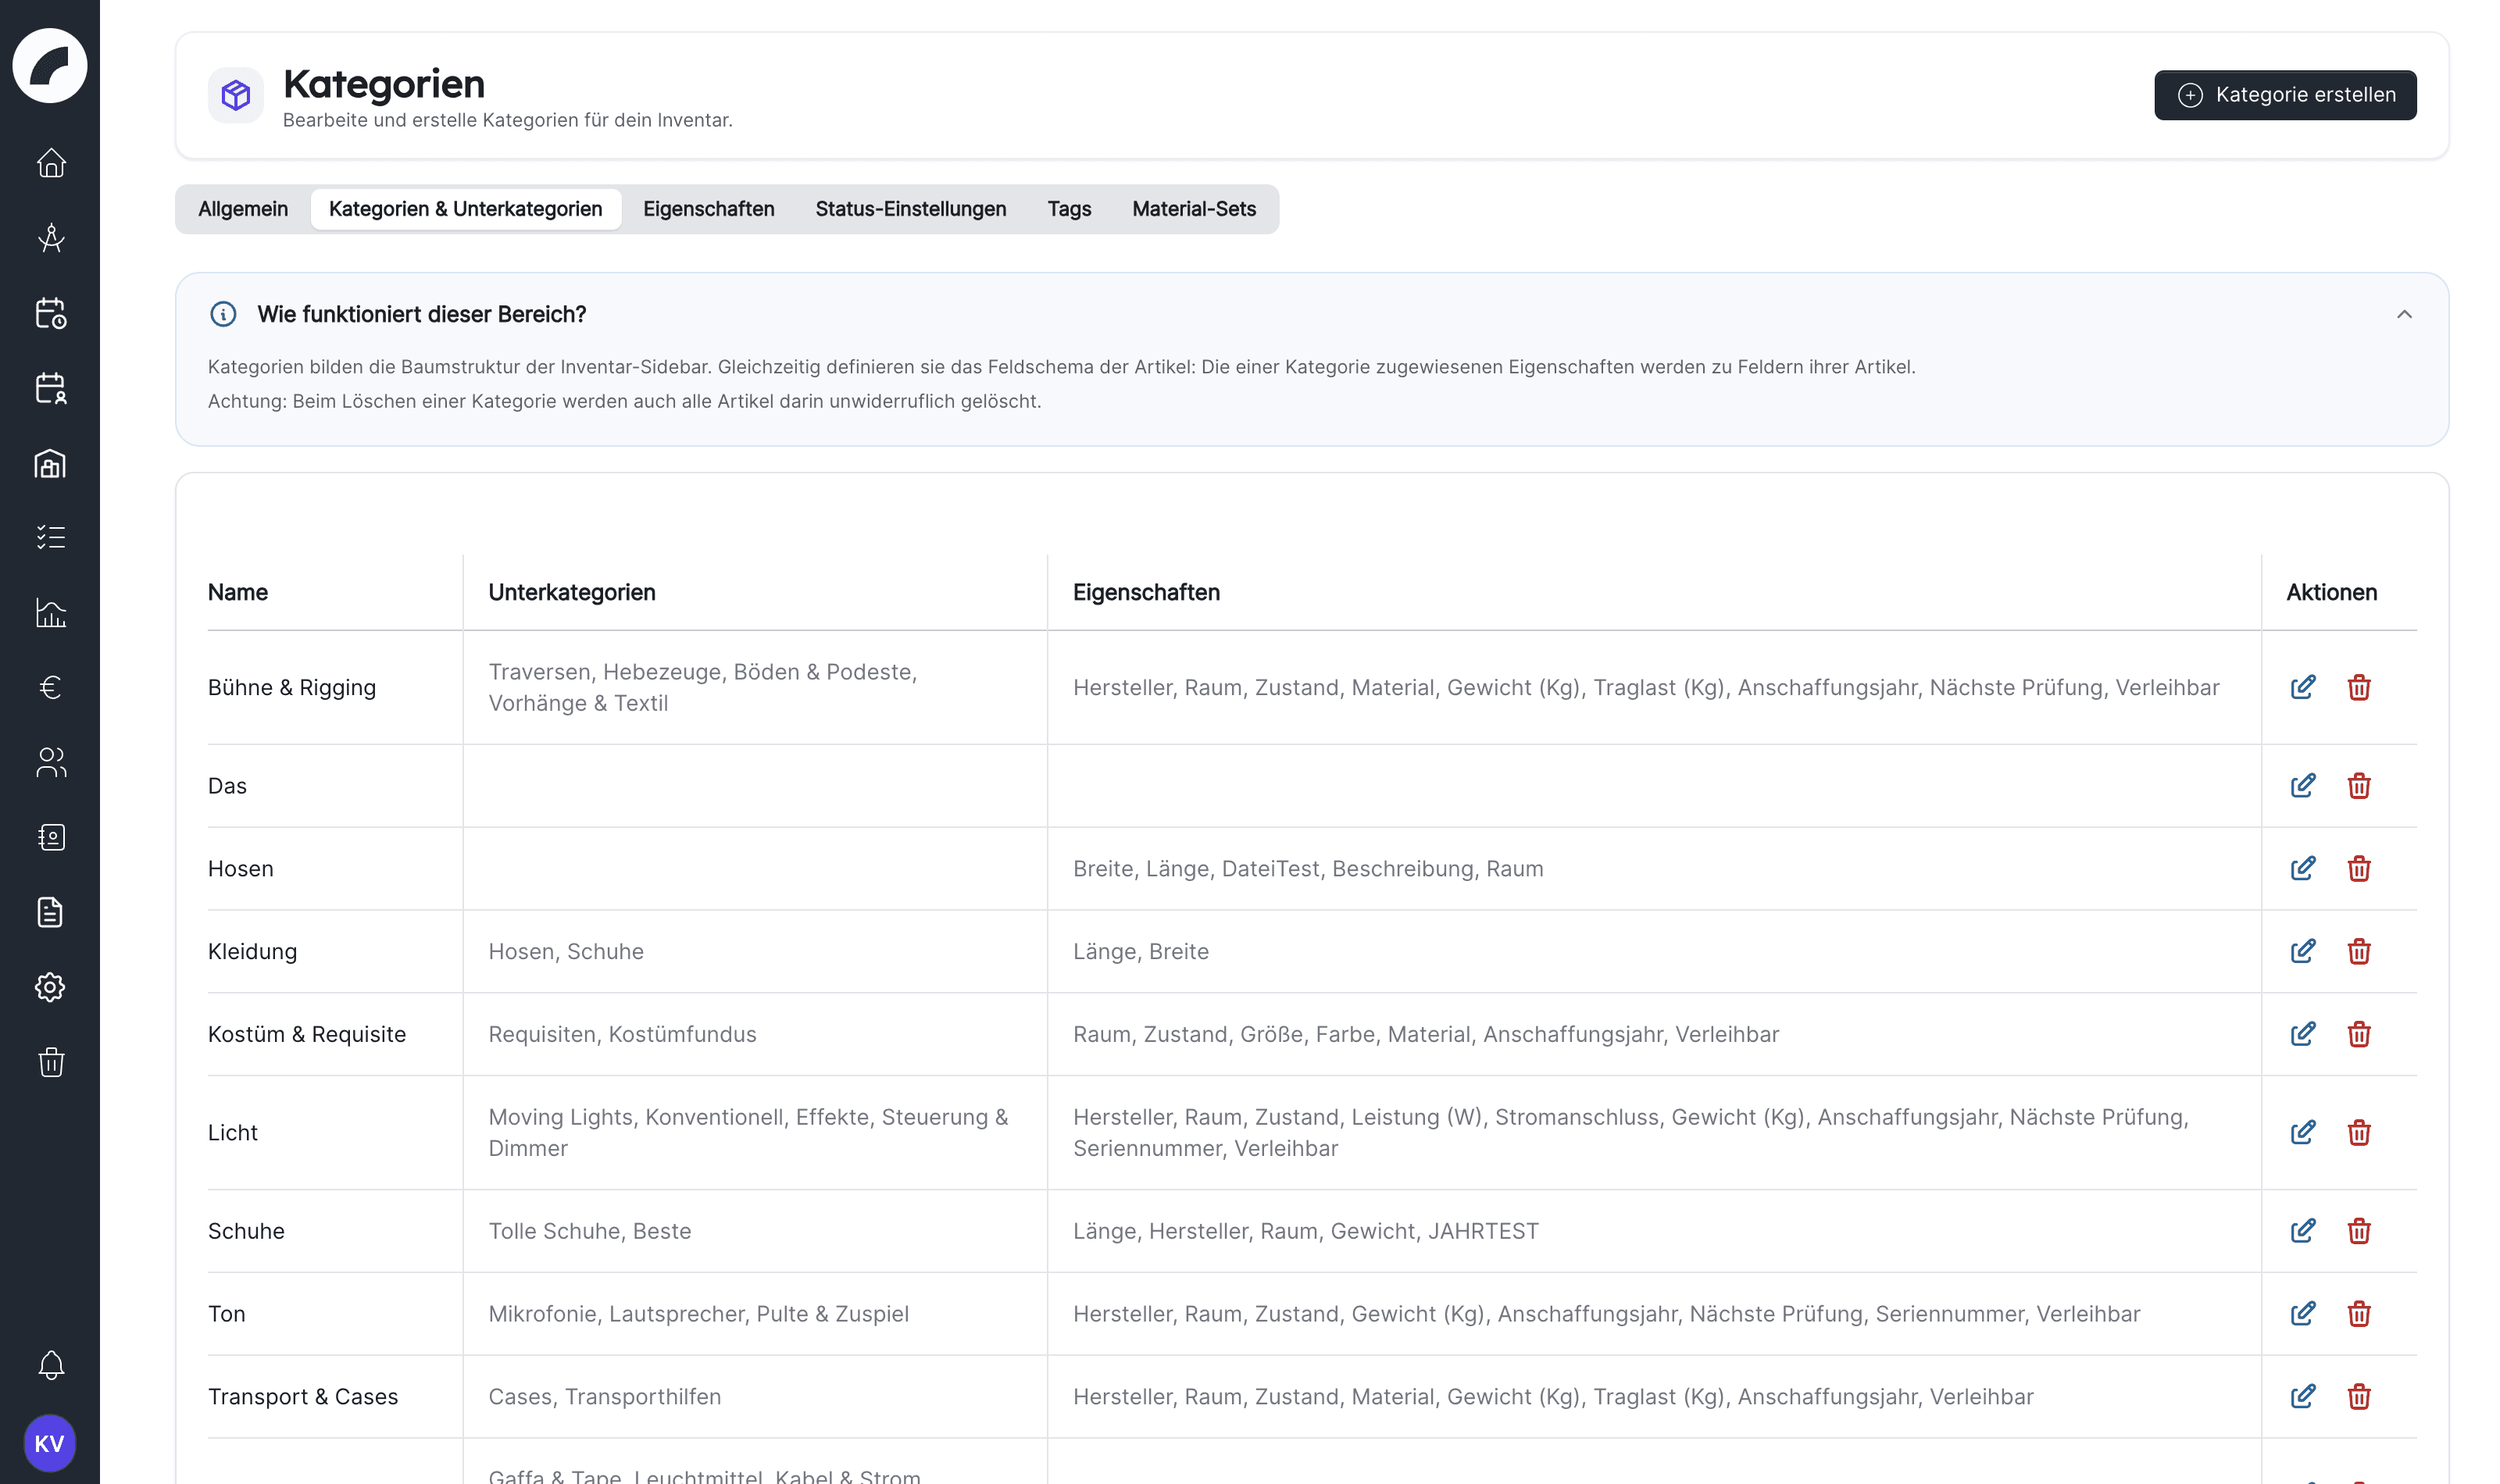
Categories form the first navigation level and subcategories refine it. Properties assigned to a category describe the articles within it and become the fields of the article form. Subcategories add further fields on top of those of the category. Use categories for stable areas such as audio, lighting, or furniture; temporary attributes such as “Festival 2027” are better suited to tags.
In the Create Category dialog, and when editing, you also define:
- the order of the assigned properties by drag and drop. It determines the order of the fields in the article form and of the columns in the article overview,
- a Default Value per property that prefills the field for new articles of this category.
Before restructuring a used category, check affected articles and whether their properties remain understandable.
A category can only be deleted when it no longer contains articles. Articles in the recycle bin count as well: move the articles to another category or delete them permanently first. The subcategories of an empty category are deleted with it. If you delete only a subcategory, its articles stay in the parent category and merely lose the subcategory assignment. The confirmation prompt and the note in the categories tab say so as well Coming with the next update.
Properties
Properties may contain text, number, date, year, time, date/time, checkbox, selection, file, or special room/manufacturer links.
The Room and Manufacturer properties are predefined. You can rename them and change their options, but you can neither delete them nor change their data type. An optional Tooltip text appears in the article form as a hint next to the field. A property only takes effect once it is assigned to a category or subcategory.
For the Selection data type, enter the selectable values with Selection Add value; the property cannot be saved without at least one value. If you delete a property, its values are lost on all articles.
| Option | Effect |
|---|---|
| Filterable | Property becomes available in the inventory filter and in the material set dialog. |
| Show in article overview | Property appears as a column or overview detail. |
| Value required | Articles in the category require a value. |
| Across all articles | One value applies to every detailed unit. |
| Individual value | Value is excluded from duplication and bulk editing. |
Drag and drop controls the order of the properties in this list. The order of an article's fields is set in the respective category instead. Use individual value for serial numbers and other unique identifiers.
Statuses
Statuses split article quantity by condition. The status catalog is fixed: Einsatzbereit (ready for use), Defekt (defective), Nicht auffindbar (missing), Ausgesondert (retired) and fest verbaut (permanently installed). On the Status Settings tab you can change the colour (menu Edit) and set the order by drag and drop. You cannot create, rename or delete statuses.
Einsatzbereit is the default status: only its quantity counts as available, and article planning uses it as the available base quantity. The article dialog highlights this status in the status list. The order defined here applies wherever status quantities are shown.
Agree in your team on what each status means for you: material in Defekt, Nicht auffindbar, Ausgesondert or fest verbaut is not available for any issue.
Tags and tag groups
Tags are coloured, combinable attributes. Groups organise them in the filter, for example by location, safety, or inspection state. A tag needs a name and a colour; the tag group is optional.
Tag use and editing can be restricted to selected users and departments: tick Restrict editing of this tag in the tag dialog and select the people and departments via the search. Without the tick, everyone with access to the inventory can use the tag. If you remove the tick again, Artwork deletes the stored releases. The restriction applies to the whole article: anyone who is not released for all restricted tags of an article can neither edit nor delete that article, even with the Create & edit inventory permission. Admins are exempt. A protected tag should therefore have a clear owner and meaning.
If you delete a tag group, its tags remain and are merely no longer grouped. If you delete a tag, it is removed from all articles.
Recommended setup order
- Agree on the meaning of the statuses and of ready-for-use stock, then set colours and order.
- Create stable categories and subcategories.
- Define reusable properties with suitable data types.
- Assign them to categories and use required fields sparingly.
- Create tag groups, tags, and access restrictions.
- Set inventory-number display and detailed-unit quantity logic.
- Create sample articles and verify search, table, and planning views.
- Only then prepare common equipment as material sets.
Last updated on